

How To Clean A Canvas Print: Safe Steps For Dust & Stains
A canvas print can hold its own on any wall for years, until a layer of dust or an unexpected stain dulls its colors. Knowing how to clean a canvas print the right way makes the difference between restoring it to its original look and accidentally causing permanent damage to the surface or ink. It's a common concern, and for good reason: canvas is a textured material that reacts differently to moisture and pressure than glass or metal.
At Yourwallarts, we produce made-to-order canvas prints across a wide range of themes, from Viking-inspired art to dramatic dark compositions. Because we want every piece to look stunning long after it arrives at your door, we've put together this guide based on what actually works for the type of high-quality canvas prints we ship daily.
Below, you'll find clear, step-by-step instructions for removing dust, handling stains, and keeping your canvas print in top condition without special tools. We'll also cover the mistakes that cause the most damage so you can avoid them from the start.
What you need and what to avoid
Before you start cleaning, gathering the right materials saves you from stopping mid-process and reaching for something that could harm the print. Canvas prints are more delicate than they look, and the wrong cloth or cleaning product can lift ink, leave streaks, or warp the frame behind the canvas. Taking two minutes to set up properly makes the whole process smoother and safer.
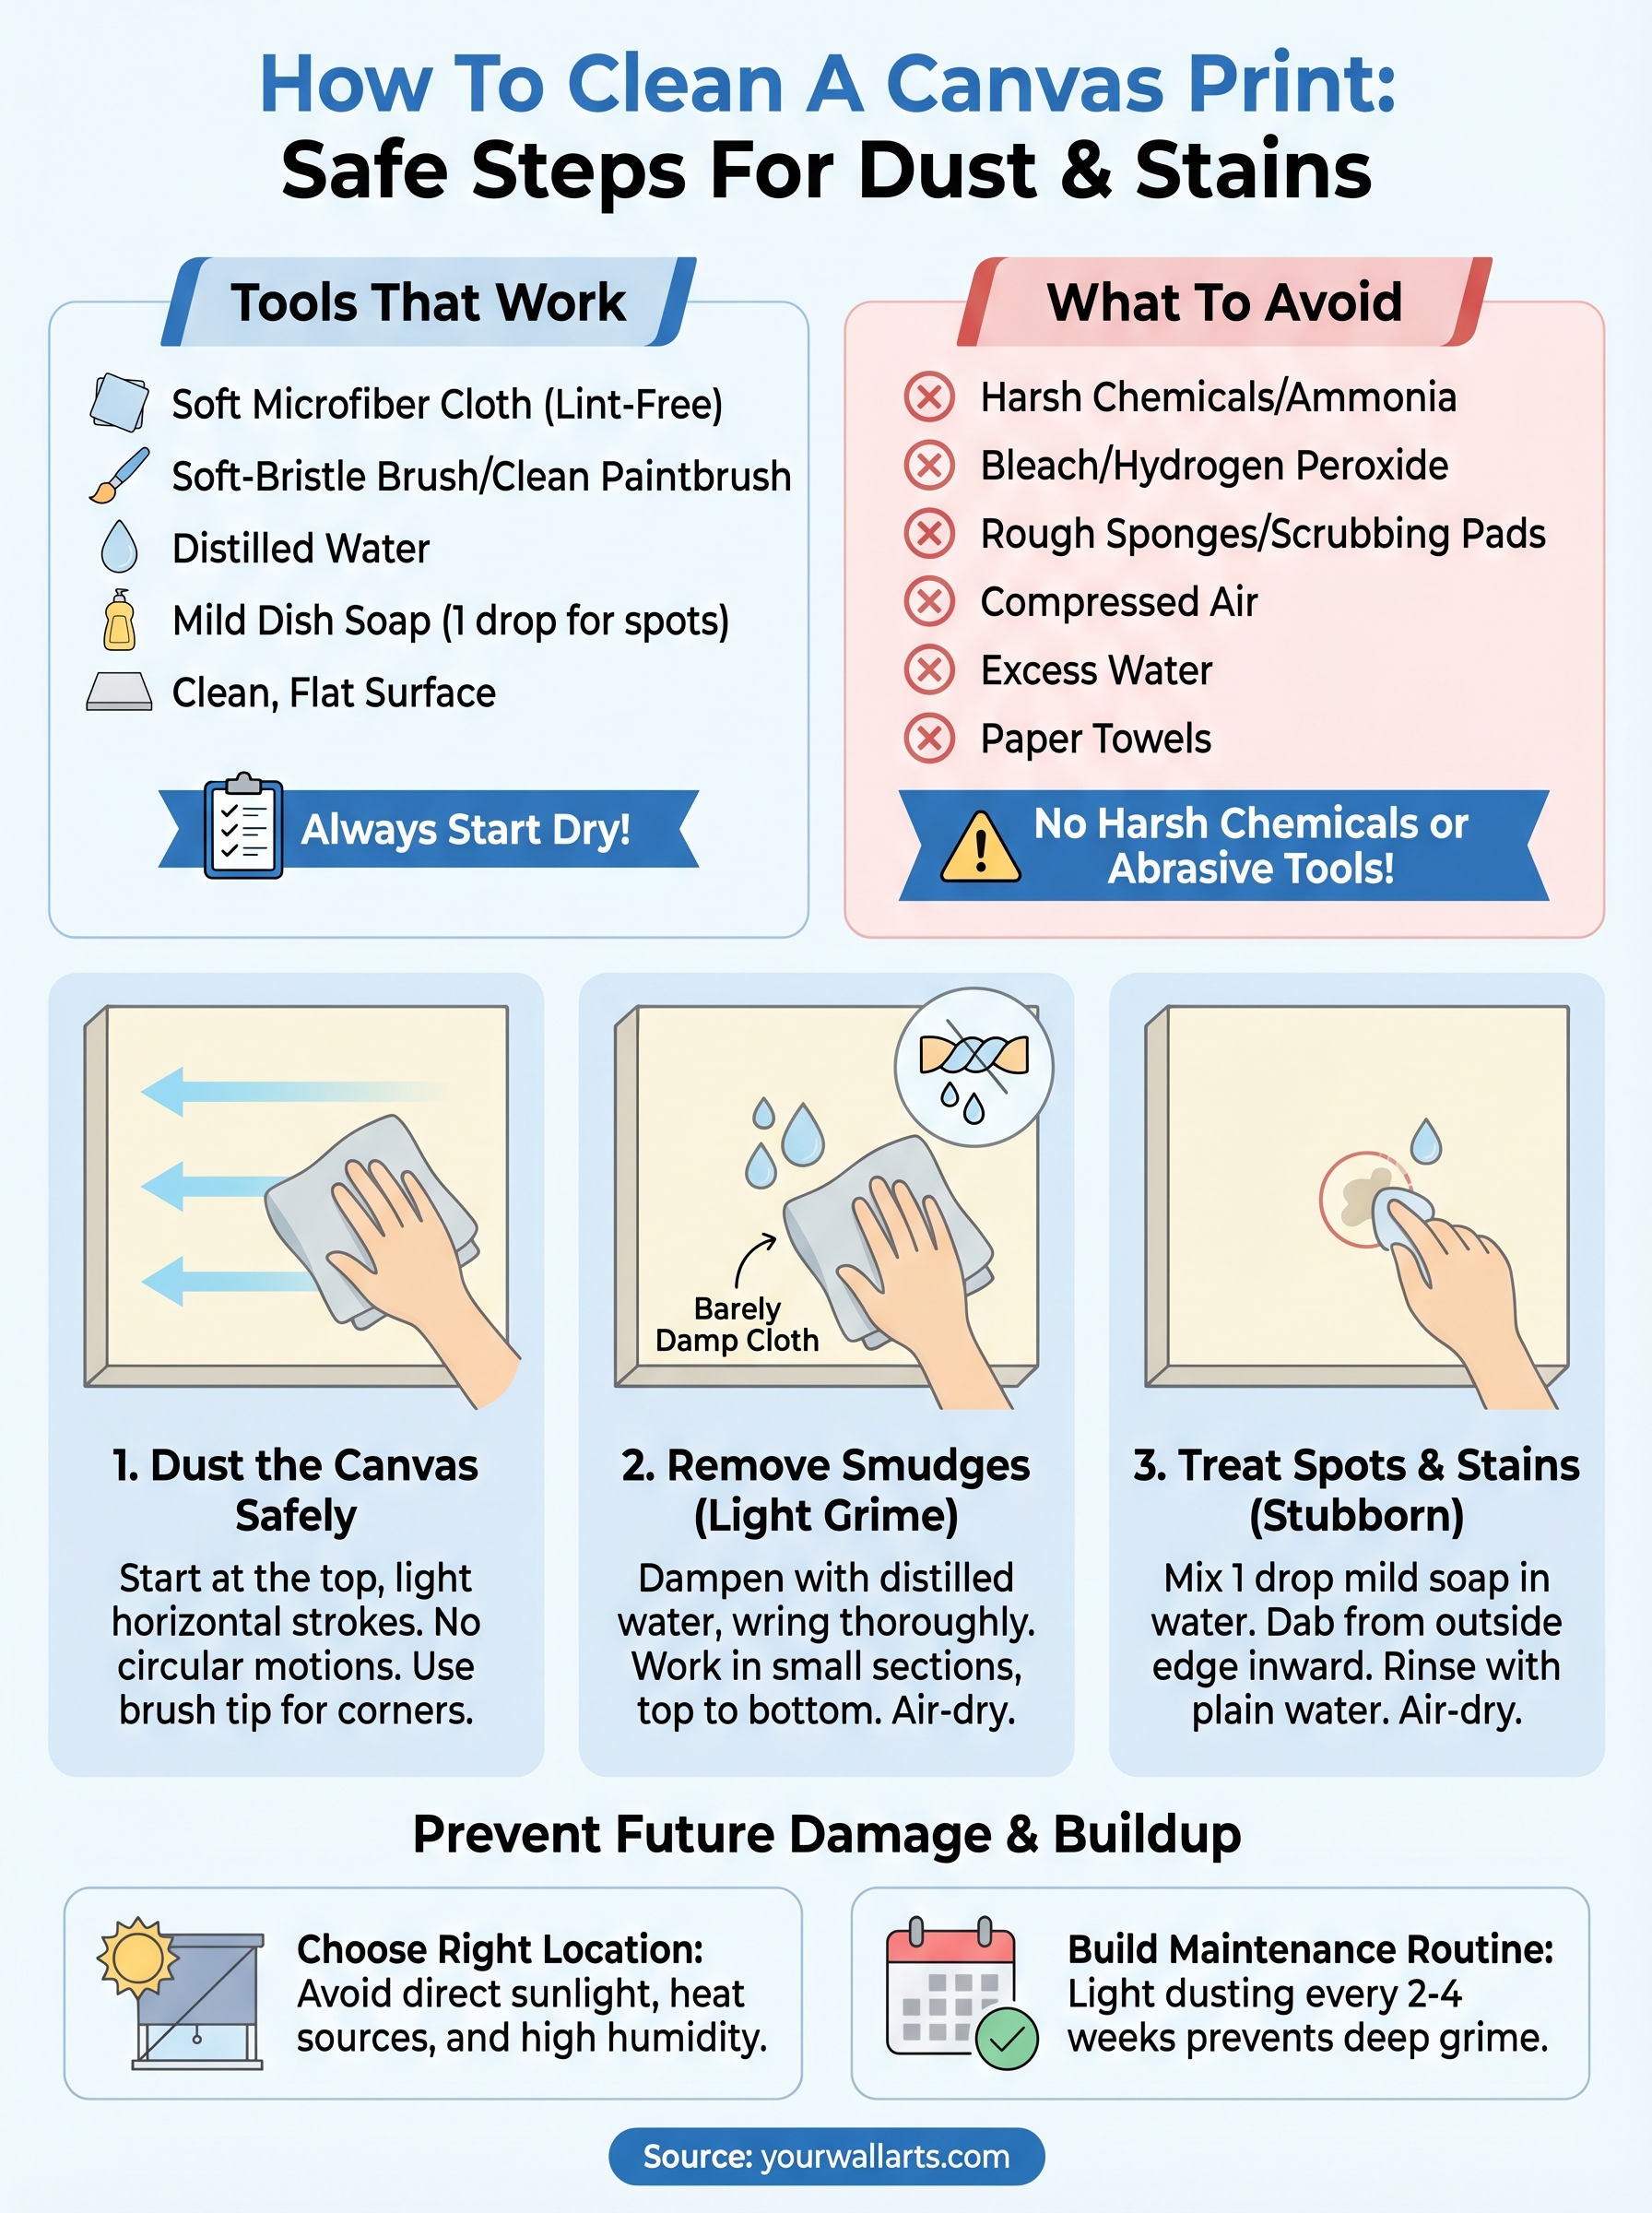
Tools that work for canvas
You don't need anything specialized to clean a canvas print effectively. Most of what you need is already at home, and the goal is always to use the gentlest option available before moving on to anything stronger.
Here's what to have on hand:
- Soft microfiber cloth (lint-free; dry for dusting, slightly damp for stains)
- Soft-bristle brush or a clean dry paintbrush (for working into the texture)
- Distilled water (tap water can leave mineral deposits on the surface)
- Mild dish soap (one drop mixed into distilled water for stubborn spots only)
- A clean, flat surface to lay the print on during any spot treatment
Never use paper towels or rough cloths on a canvas print. Their texture is abrasive enough to scratch the surface coating or drag ink across the weave.
What you must never use
Knowing how to clean a canvas print also means knowing what to keep away from it entirely. Harsh chemicals and abrasive tools are the most common causes of irreversible damage, and many people reach for them out of habit when cleaning other surfaces around the house.
Avoid all of the following:
- Alcohol-based cleaners, window sprays, or any product containing ammonia
- Bleach or hydrogen peroxide, even in diluted form
- Rough sponges, scrubbing pads, or any textured cleaning material
- Compressed air canisters held too close, which can push debris deeper into the weave or cause condensation
- Excess water, which can seep through the canvas, warp the wooden stretcher bars, or create conditions for mold over time
Sticking to this short list of safe tools keeps the process simple and protects both the surface of the print and the structural integrity of the frame underneath it.
Step 1. Dust the canvas safely
Dusting is the first step every time you clean a canvas print, regardless of whether you're doing a full clean or just routine upkeep. Skipping this step and going straight to a damp cloth pushes loose particles into the weave, which makes smears and stains harder to remove later. Always start dry.
The right motion and pressure
Pick up your soft microfiber cloth or dry paintbrush and begin at the top of the canvas, working your way down. Gravity is on your side here: dust falls downward, so starting at the top prevents you from dragging debris back over areas you've already cleaned.
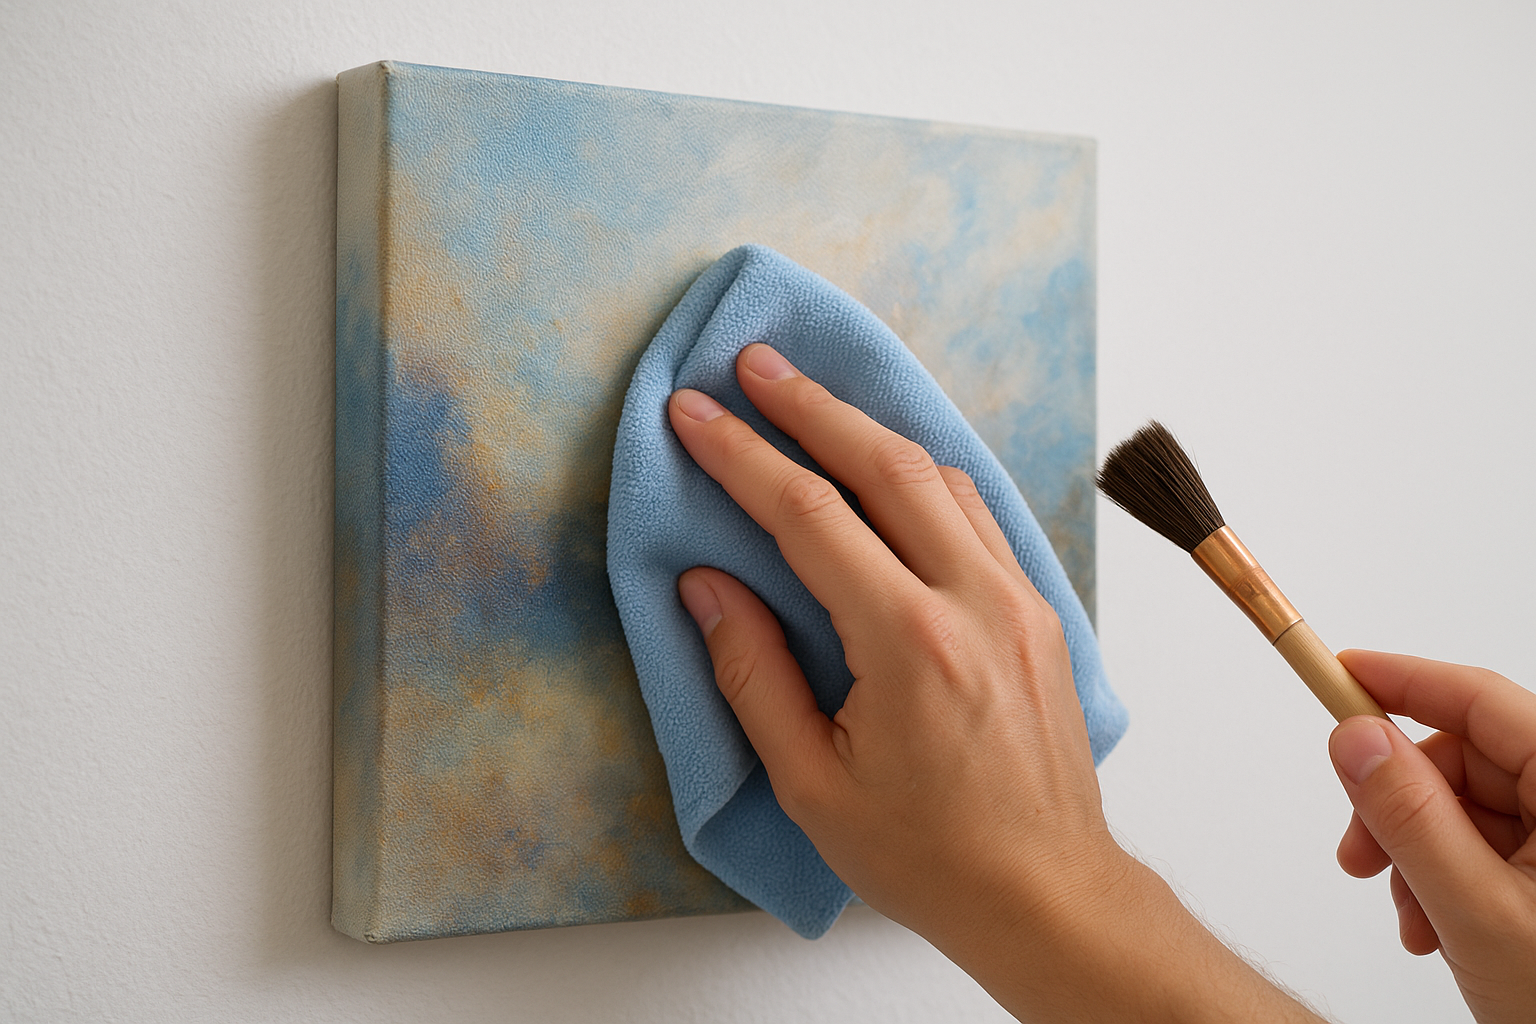
Use light, horizontal strokes rather than circular scrubbing motions. Circular motions grind particles into the texture of the canvas, while straight strokes lift them off the surface more effectively. Keep your pressure feather-light. You're not trying to polish the surface; you're coaxing dust off it.
If you're using a paintbrush, hold the handle near the middle rather than at the base so you have less leverage and naturally apply less force to the canvas.
Handling corners and edges
Corners and the edges near the frame collect significantly more dust than the flat center of the print. Use the tip of a dry paintbrush to work into those areas with small, controlled strokes. This is one part of how to clean a canvas print where patience matters most. Rushing through the edges often causes the brush to catch on the fold and leave marks along the border.
Step 2. Remove smudges and light grime
Once the loose dust is off, you can address smudges and light surface grime that dry dusting can't lift. This step involves moisture, and that's where most cleaning mistakes happen. Too much water is the biggest risk at this stage, so the cloth you use should feel barely damp, not wet.
Never spray water or any cleaning solution directly onto the canvas surface. Always apply it to the cloth first, then transfer that minimal moisture to the print.
Preparing your damp cloth correctly
Dampen one corner of your microfiber cloth with distilled water and wring it out completely. Before touching the canvas, press the cloth against a dry area of the fabric. If it leaves a visible wet patch, it's still too wet, so wring it again until the surface feels almost-dry with only a slight coolness.
Check the cloth against the back of your hand before you start. If it feels wet rather than barely damp, you risk pushing moisture through the canvas fiber and into the wooden stretcher frame underneath, which can cause warping over time.
How to work across the surface
Start at the top of the canvas and use short, straight strokes moving downward, the same direction you used while dusting. Lift the cloth slightly between each pass rather than dragging it across the surface continuously. This prevents moisture from concentrating in any single spot.
Knowing how to clean a canvas print well means working in small sections and letting each area air-dry briefly before moving to the next. Check each section in natural light to confirm the smudge is fully gone before you continue.
Step 3. Treat spots and stubborn stains
Some marks survive dry dusting and a barely damp cloth. When that happens, you need a mild soap solution applied with precision. This is the most hands-on part of how to clean a canvas print, and the key is working on the stain directly rather than rubbing across a wide area. Treating a small spot aggressively can spread the stain and create a larger, harder-to-remove mark, so every move here should be deliberate.
Making the cleaning solution
Mix one single drop of mild dish soap into a small bowl of distilled water. That ratio is intentional. More soap leaves a residue that attracts dirt faster once the print is back on the wall. Stir the mixture gently until the soap disperses, then dip the corner of a clean microfiber cloth into it and wring thoroughly before touching the canvas.
Using more soap does not clean better. It leaves a film on the surface that is harder to remove than the original stain.
Applying it without spreading the stain
Work from the outside edge of the stain inward using small dabbing motions rather than strokes. This technique contains the stain instead of dragging it across surrounding fibers. After two or three light applications, switch to a fresh section of your cloth dampened with plain distilled water to rinse the area. This step removes any soap residue before it dries on the surface.
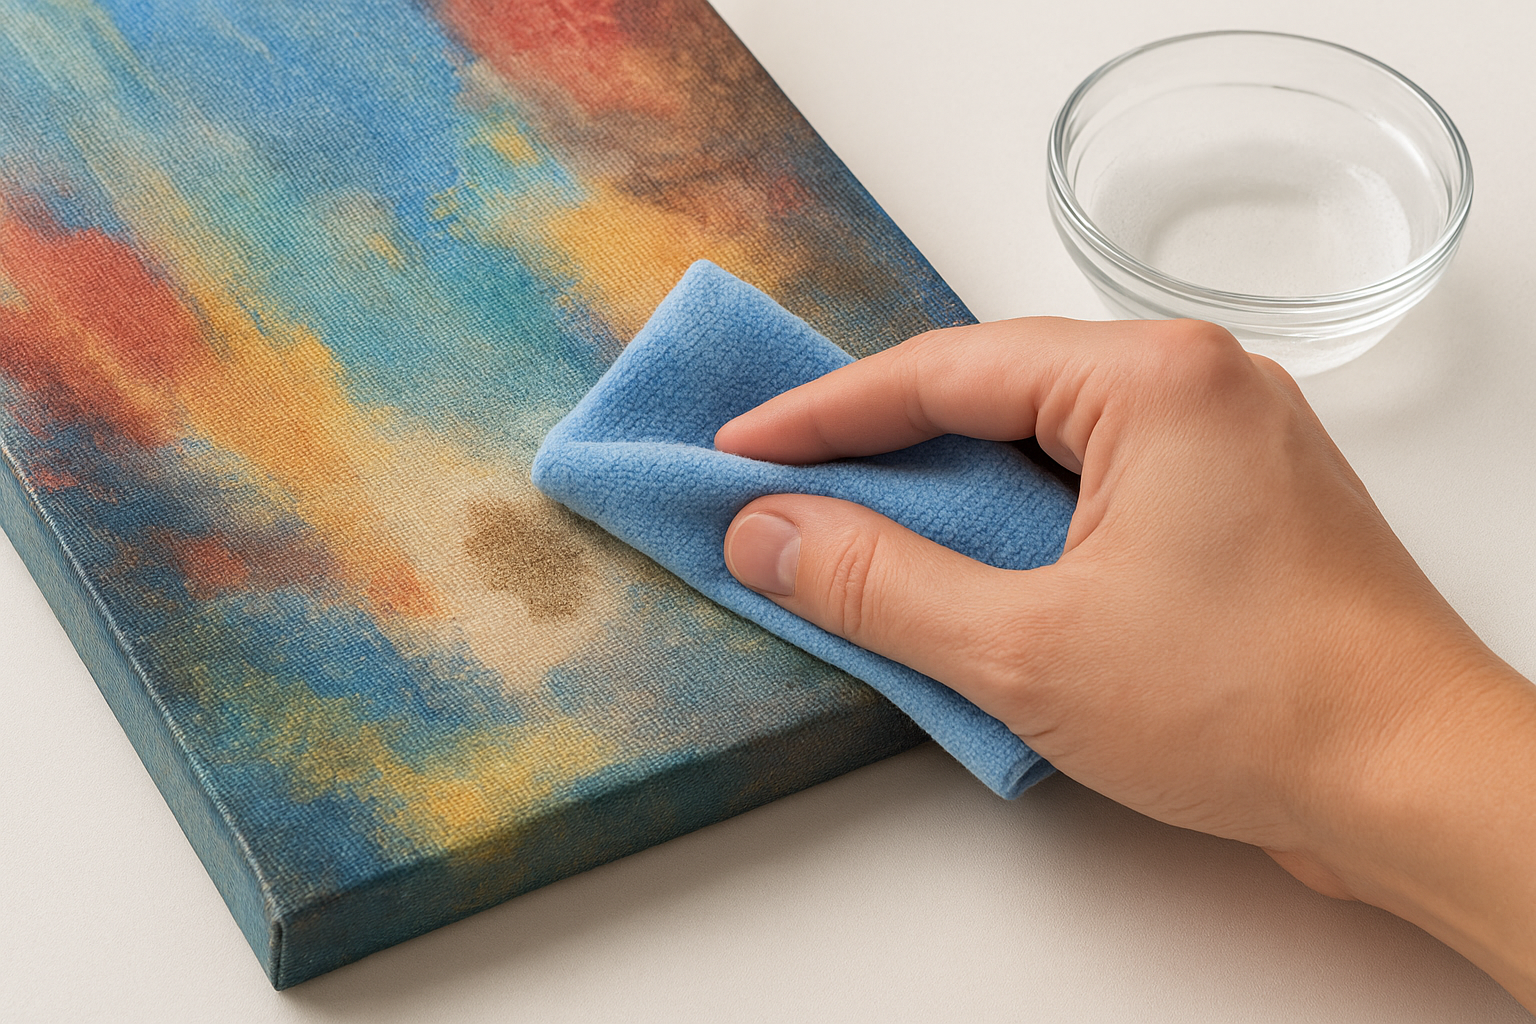
Let the spot air-dry completely and check it in natural light before deciding if a second pass is necessary.
How to prevent future damage and buildup
Cleaning a canvas print takes real effort, so reducing how often you need to do it saves time and protects the print from repeated handling. Where you hang the print and how consistently you maintain it between cleaning sessions determines whether you're dealing with light dust every few weeks or stubborn grime that requires the full spot-treatment process. Building two simple habits keeps your canvas in better shape with far less work.
Choose the right hanging location
Direct sunlight is the fastest way to degrade a canvas print over time. UV rays fade ink gradually, and no amount of careful cleaning reverses that kind of color loss. Position your print somewhere that receives indirect natural light or consistent artificial lighting, away from windows where afternoon sun hits the wall directly. High-humidity rooms like bathrooms and spaces near cooking surfaces also accelerate damage by softening the canvas fiber and weakening the ink layer over time.
Keeping your canvas print away from heat sources like radiators and vents matters just as much as avoiding sunlight, since dry heat causes the canvas to contract and the surface coating to crack.
Build a simple maintenance routine
Knowing how to clean a canvas print the right way matters less if you let buildup accumulate for months between sessions. A quick pass with a dry microfiber cloth every two to four weeks removes surface dust before it settles deep into the weave. Keep your maintenance short and consistent by using this simple schedule:
- Every 2 to 4 weeks: Light dry dusting with a microfiber cloth
- Every 3 months: Full dry dusting plus a check for smudges
- As needed: Damp cloth or mild soap solution for any visible spots
Two minutes of regular dusting prevents the need for deep cleaning far more often than you'd expect.
Final checks before you hang it back up
Before you rehang your canvas print, run through a few quick checks to confirm the cleaning process is fully complete. Hold the print at an angle under natural light or a lamp and scan the surface slowly. Any remaining smudge or residue will catch the light and show up clearly from this angle, giving you one last chance to address it before the print goes back on the wall. The canvas must also be completely dry, with no cool or damp spots anywhere on the surface or along the edges near the frame.
Knowing how to clean a canvas print is only part of keeping it looking its best. Once you've confirmed the surface is clean and dry, check that the hanging hardware is secure and that the print sits level. If you're looking for a new piece to add to your space, browse the full collection at Yourwallarts for ready-to-hang canvas prints built to last.