

How To Hang Acrylic Glass Prints: 6 Ways Without Damage
You just unboxed your acrylic glass print, and now you're staring at your wall wondering how to hang acrylic glass prints without cracking the piece or destroying your drywall. Fair concern, acrylic glass is heavier than a standard poster and far more unforgiving if it takes a tumble. Getting the mounting method right matters, both for the safety of the print and the look you're going for.
At Yourwallarts, every acrylic glass order ships with a complete hanging kit and instructions, so you're never left guessing. But we also know that renters, minimalists, and DIY-ers sometimes want alternatives, methods that skip the drill entirely or work on surfaces where screws aren't an option. That's exactly what this guide covers.
Below, you'll find six proven ways to mount acrylic glass prints on your wall, from standoff hardware and anchors to fully damage-free adhesive options. Each method includes step-by-step instructions so you can pick the one that fits your space, your walls, and your comfort level with power tools.
What to know before you hang acrylic glass
Acrylic glass prints are not the same as paper posters or framed canvas. The material itself is dense and rigid, which means the hanging method you choose needs to match the print's weight and your wall type. Before you decide how to hang acrylic glass prints, spend two minutes gathering basic information about your print and your wall. That prep work prevents most installation mistakes and saves you a second trip to the hardware store.
Weight and size: know what you're working with
Most acrylic glass prints in the 40x60 cm range weigh between 1.5 and 2.5 kg (roughly 3 to 5.5 lbs). Larger formats like 80x120 cm can exceed 6 kg (about 13 lbs), and that changes which hardware you can safely use. Adhesive strips are rated for specific maximum weights, and exceeding that limit risks the print falling off the wall mid-display.
Always check the weight rating of your chosen hardware before installation, not after.
| Print size | Approximate weight | Recommended method |
|---|---|---|
| 40x60 cm | 1.5 – 2.5 kg | Adhesive strips or standard wall anchors |
| 60x80 cm | 2.5 – 4 kg | Wall anchors or standoff hardware |
| 80x120 cm | 5 – 7 kg | Standoff hardware with wall anchors |
Know your wall surface before you drill or stick
Drywall, plaster, concrete, and tile each behave differently when you install hardware. Standard drywall is the most forgiving surface for both adhesive strips and screws, but you need to hit a stud or use the correct anchor if your print weighs more than 3 kg. Plaster walls are harder and more brittle, so drilling requires a masonry bit and a slower drill speed to avoid cracking the surface around the hole.
Concrete and brick walls need masonry anchors entirely, and adhesive strips typically won't bond reliably to rough or porous surfaces. If you're renting and can't touch the walls at all, skip ahead to Step 4 for fully damage-free hanging options. Knowing your surface type upfront is the single fastest way to narrow down which of the six methods actually fits your situation.
Step 1. Choose the right method from 6 options
Picking the right method before you touch the wall saves you from restarting halfway through. The six approaches below cover every common wall type and weight range, so knowing your print size and surface material from the previous section makes this step straightforward. Read through the full list once, then commit to one method before you gather tools or mark the wall.
Match the method to your wall type and print weight first - the wrong combination is the most common reason acrylic prints fall.
The 6 methods at a glance
Each method below addresses a specific situation for how to hang acrylic glass prints. Standoffs and wall anchors suit permanent installations and heavier pieces, while the last two options keep your walls completely intact.
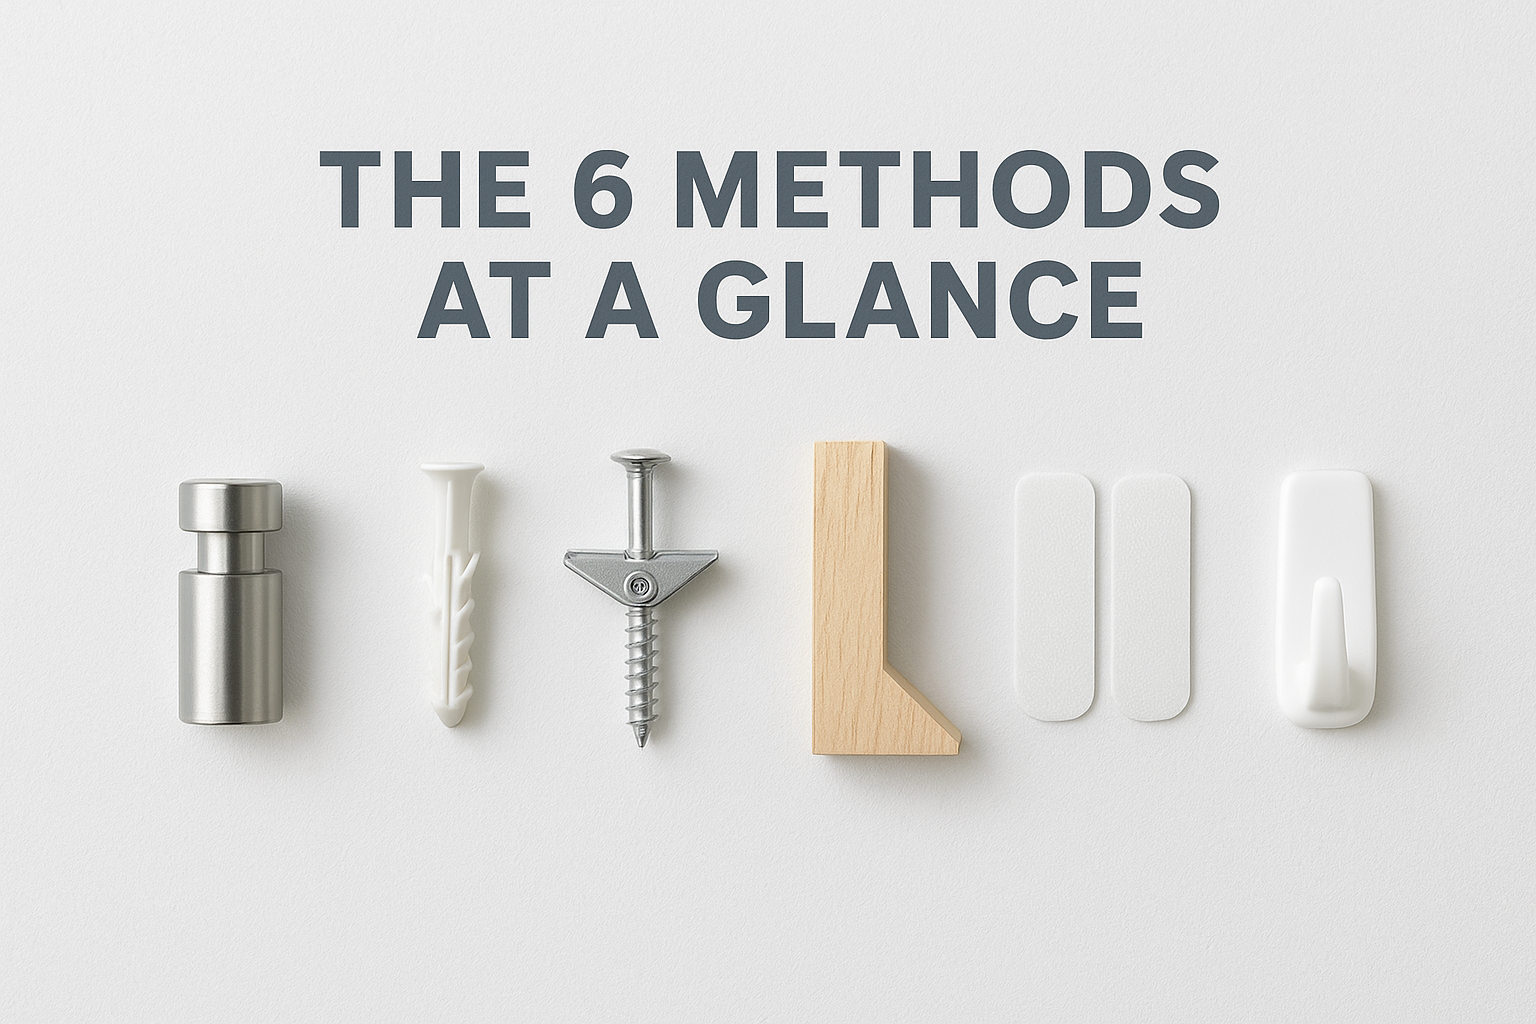
| # | Method | Best for | Drilling required |
|---|---|---|---|
| 1 | Standoff hardware | Medium to heavy prints, modern look | Yes |
| 2 | Wall anchors + screws | All weights, standard drywall | Yes |
| 3 | Toggle bolts | Heavy prints on drywall without studs | Yes |
| 4 | French cleat | Large formats or gallery arrangements | Yes |
| 5 | Adhesive strips | Light to medium prints, rental walls | No |
| 6 | Adhesive hooks | Light prints, temporary display | No |
Methods 1 through 4 require a drill and deliver the most secure, long-term result on any surface. Methods 5 and 6 work well if you rent or prefer not to make holes, but you must stay within the weight limits printed on the product packaging - going over that limit is what causes damage, not the method itself.
Step 2. Measure, mark, and hit the right height
Accurate measuring saves you from filling in extra holes later. The standard rule for hanging wall art places the center of the piece at eye level, typically 57 to 60 inches from the floor (145 to 152 cm). This guideline applies whether you're learning how to hang acrylic glass prints in a living room or a hallway, and it keeps the piece in your natural sightline without straining to look up or down.
Measure twice, mark once - a single extra minute of prep eliminates the most common installation mistake.
Calculate the exact mounting point
Your mounting point is not the center of the print. It's the specific spot on the wall where your hardware goes. Measure the distance from the top edge of your print down to its mounting hardware, whether that's a standoff hole, keyhole slot, or hanging bracket. Subtract that number from your target top-edge height and write both figures down before touching the wall. For example, if your top edge should sit at 68 inches and your hardware is 2 inches below that, your screw or adhesive goes at 66 inches from the floor.
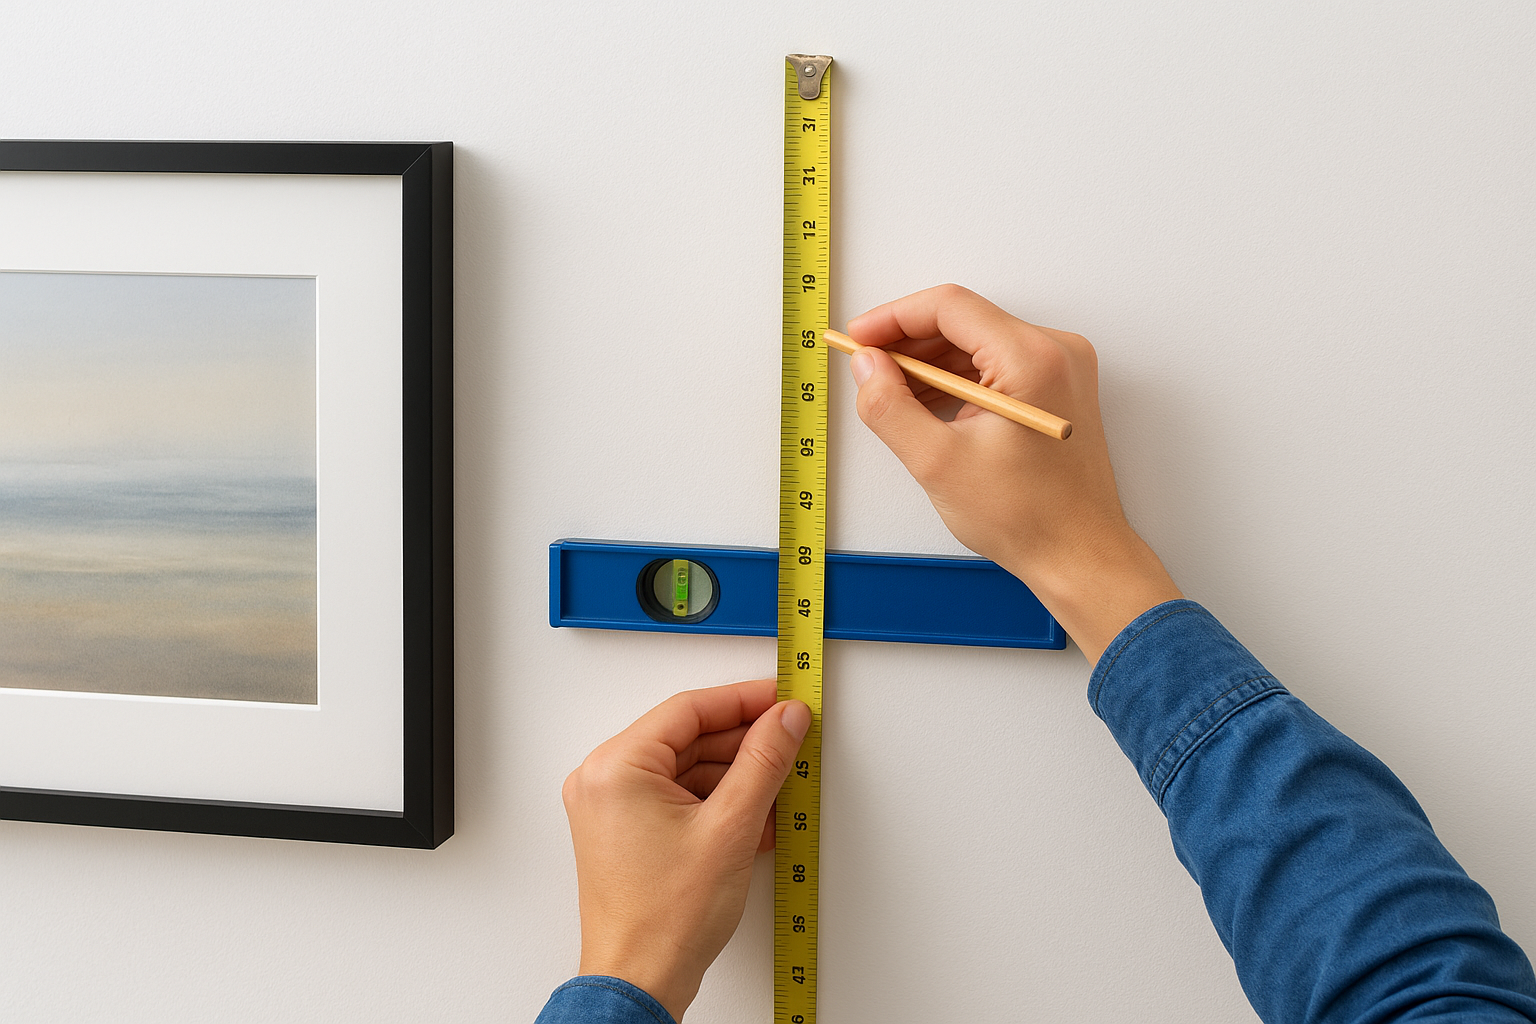
Mark and verify before committing
Use a pencil rather than a pen to mark your mounting points so mistakes wipe away cleanly. For prints with two side-by-side mounting points, place a level across both marks to confirm they share the same horizontal plane before you drill or apply adhesive. Step back and check the marks from a normal viewing distance - a few seconds of visual checking here prevents a noticeably crooked display once the print is up.
Step 3. Install drill-in mounts for medium to heavy prints
Drill-in mounts give you the most secure result when learning how to hang acrylic glass prints that weigh more than 3 kg or will stay in place long-term. Wall anchors, toggle bolts, and standoff hardware all follow the same basic installation sequence, so the steps below apply to any of the drill-in methods listed in Step 1. Work through each step in order rather than skipping ahead, because getting the anchor seated correctly is the part most people rush and regret.
Gather your tools before you start
Having everything within reach before you drill keeps the process smooth and reduces the chance of errors mid-installation. Pull together the following items:
- Power drill with a bit matched to your wall type (wood bit for studs, masonry bit for concrete or brick)
- Pencil, tape measure, and a bubble level
- Rubber mallet
- The hanging hardware included with your print or purchased separately
Drill, anchor, and mount in sequence
Start by drilling your marked holes at the depth your anchor specifies, typically 30 to 35 mm for standard drywall anchors. Tap the anchor flush with a rubber mallet rather than a hammer to avoid cracking the surrounding surface. Drive the screw into the anchor, leaving 5 to 6 mm of the screw head protruding so the print's mounting point seats properly against the wall.
For standoff hardware, thread the bolt through the pre-drilled acrylic hole before tightening the decorative cap - this sequence prevents stress cracks in the print.
Once all hardware is in place, lift the print onto the screws or standoffs, confirm the level reads flat, and make any small adjustments before fully tightening everything down.
Step 4. Hang acrylic prints without drilling or wall damage
If you rent, live in a space with freshly painted walls, or simply want a damage-free way to learn how to hang acrylic glass prints, adhesive methods work well for prints up to 4 kg. The key is surface preparation: wipe the wall with isopropyl alcohol and let it dry fully before applying any adhesive product. Skipping this step is the main reason strips peel off early.
Clean, dry, and flat surfaces are the only condition under which adhesive strips perform at their rated weight capacity.
Adhesive strips for medium-weight prints
Command strips from 3M are the most reliable option for this weight range and are widely available at hardware stores. Follow this sequence exactly for a secure result:
- Clean the wall surface with isopropyl alcohol and wait 15 minutes
- Press one side of each strip pair onto the back of the print
- Remove the liner and press the print firmly against the wall for 30 seconds
- Pull the print straight down off the wall and wait 1 hour for the adhesive to fully bond to both surfaces
- Re-hang the print and press each strip contact point for another 30 seconds
Adhesive hooks for lighter or temporary displays
Adhesive hooks suit prints under 2 kg and work best when you need a short-term display or are testing a layout before committing to a permanent spot. Choose hooks rated for at least 1.5 times your print's actual weight to give yourself a safe margin, and check the hook's packaging for the maximum load rating on your specific wall surface.
Quick recap and next step
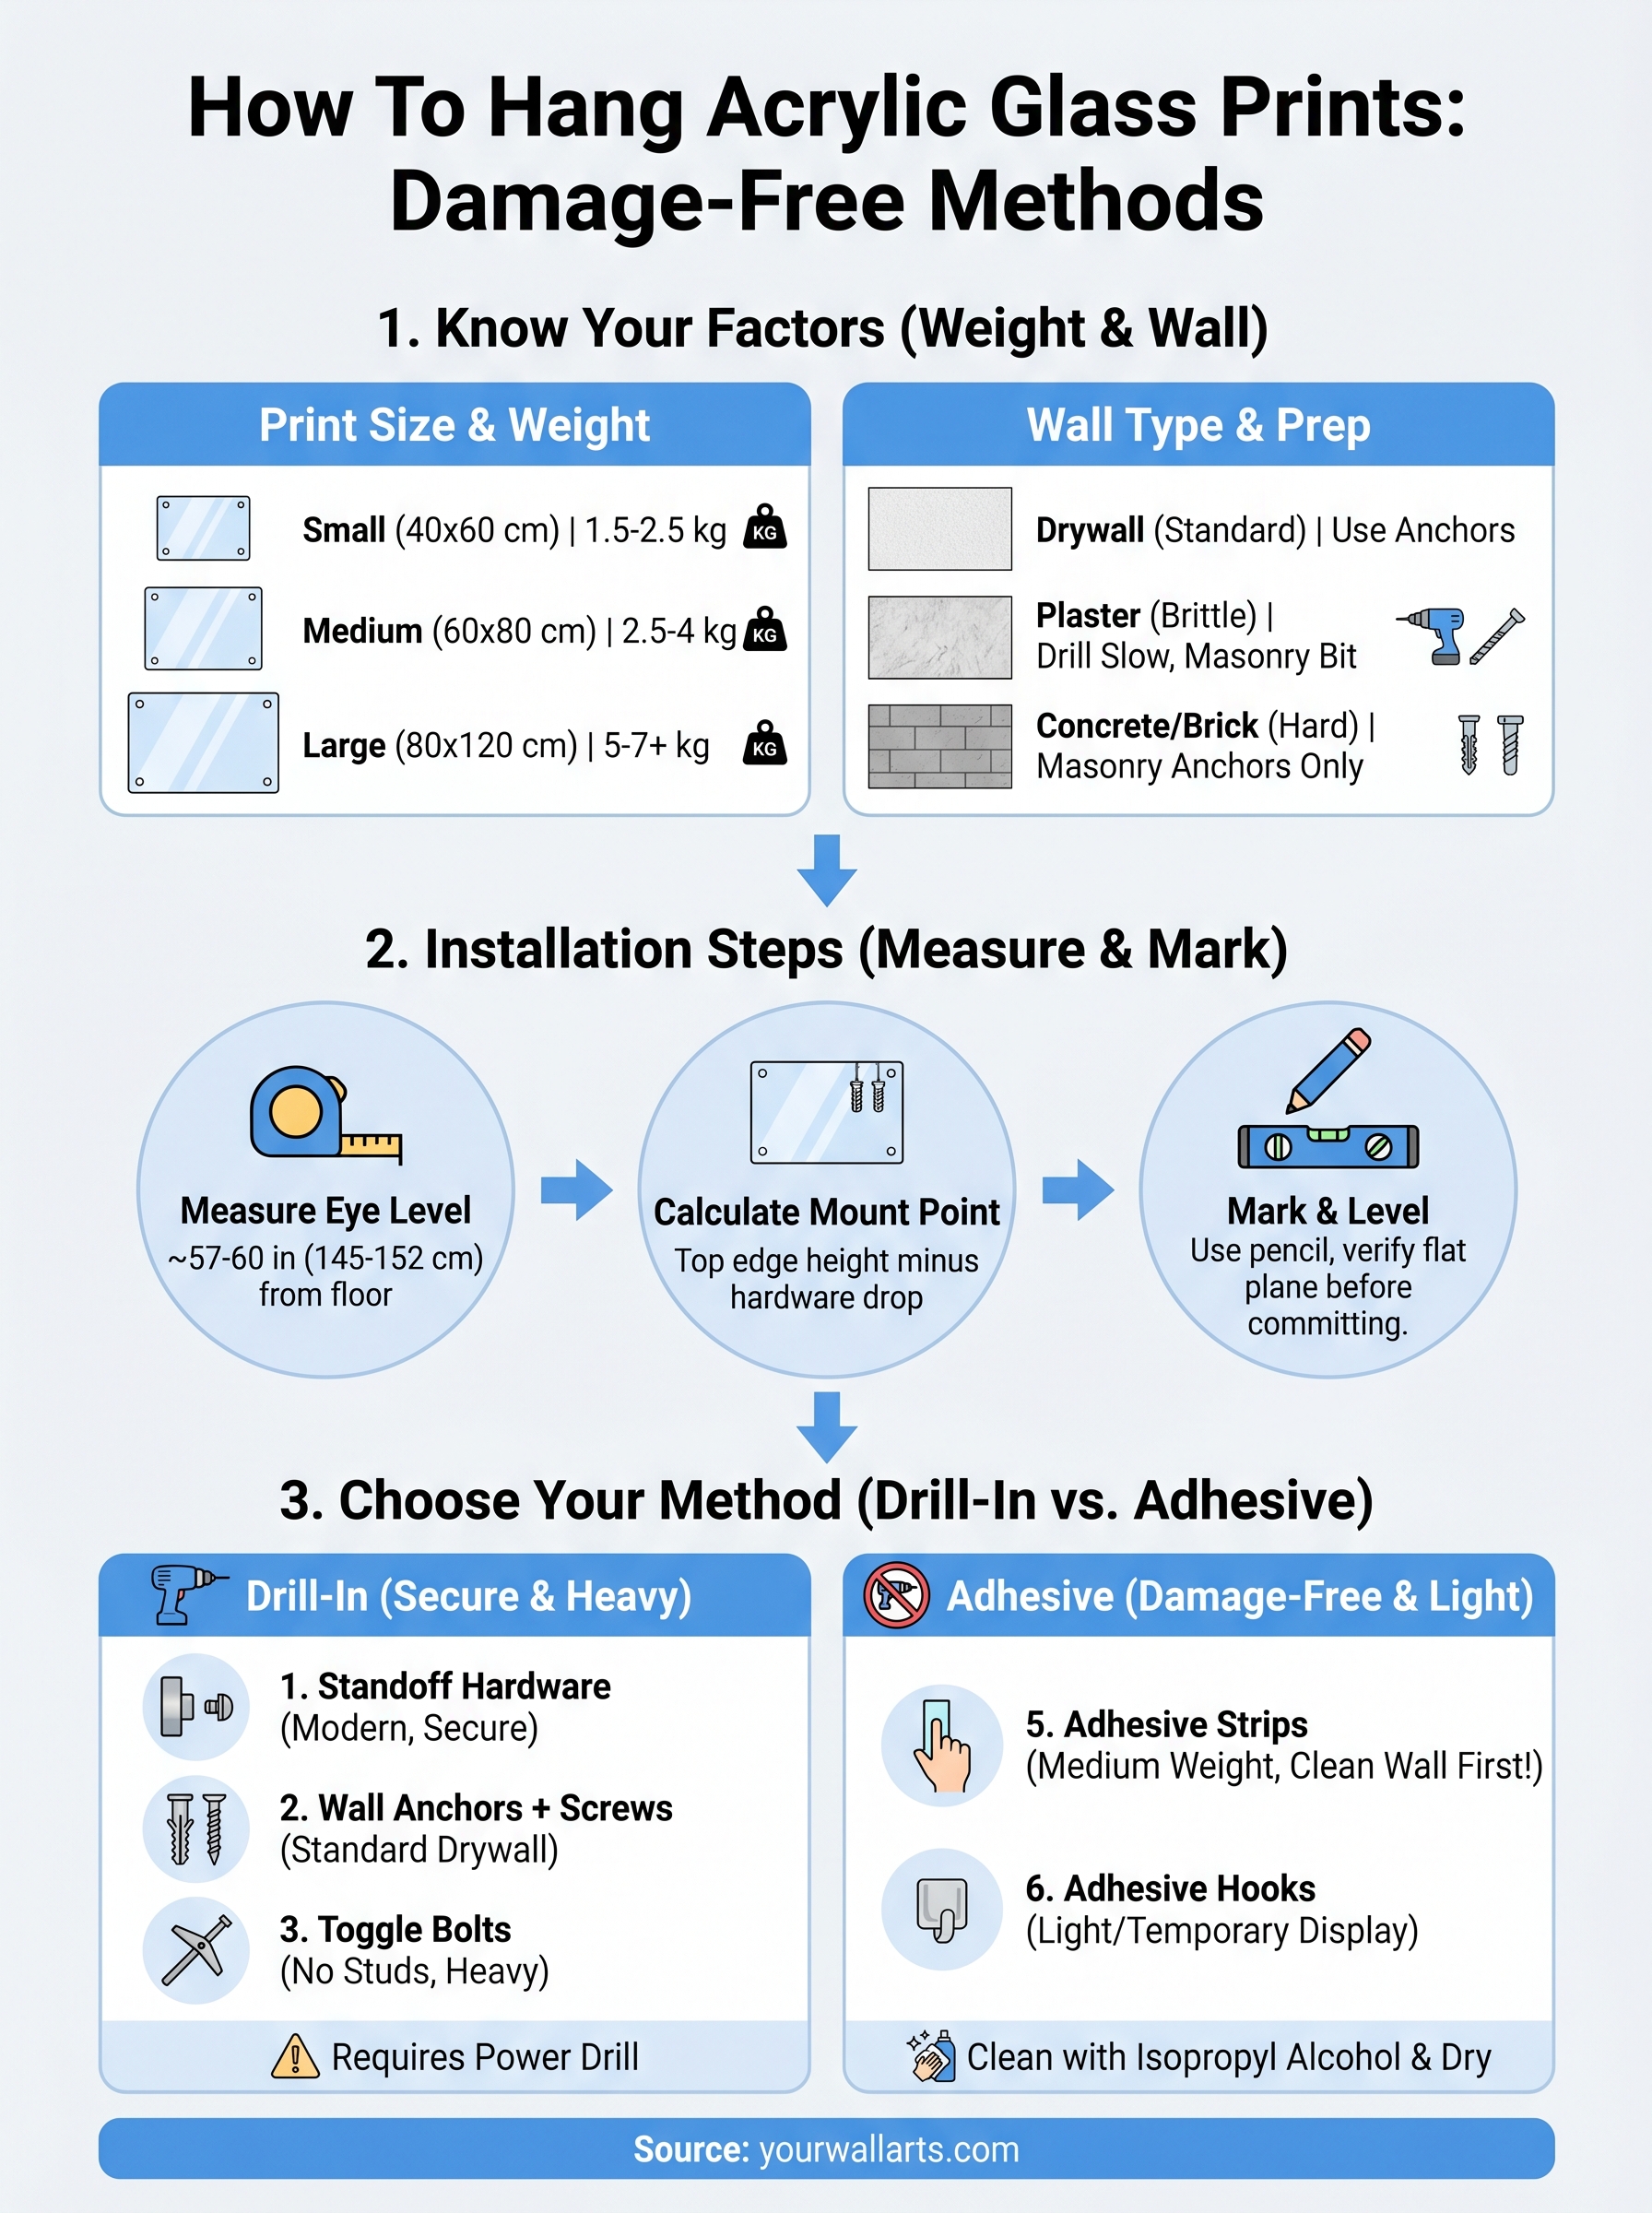
You now have everything you need to know about how to hang acrylic glass prints without damaging the piece or your walls. The process comes down to three decisions: know your print's weight, identify your wall surface, and pick the method that matches both. Drill-in mounts with standoffs or anchors give you the most secure long-term result, while adhesive strips keep your walls completely intact for lighter prints and rental spaces.
Measuring accurately matters just as much as choosing the right hardware. Mark your mounting points with a pencil, verify them with a level, and confirm your hardware rating covers your print's actual weight before you drill or stick anything. Those steps take under five minutes and prevent the most common installation mistakes, from crooked displays to strips that peel early. If you're still choosing your print, browse the full acrylic glass collection at Yourwallarts and find a piece worth displaying properly.