

How To Clean Canvas Prints At Home (No Harsh Chemicals)
A canvas print can hold up for years, until a layer of dust, a kitchen grease film, or a mysterious fingerprint starts pulling focus from the artwork itself. Knowing how to clean canvas prints the right way protects both the image and the material, so your walls keep looking the way you intended. The wrong cloth or cleaning product, though, can smear ink, warp the canvas, or leave permanent marks that no amount of wiping will fix.
At Yourwallarts, we produce premium canvas prints daily and ship them straight to our customers' walls. That hands-on experience with canvas materials means we know exactly what keeps them looking sharp, and what ruins them fast. We put this guide together based on how we'd treat our own prints, not recycled advice from generic cleaning blogs.
Below, you'll find a clear, step-by-step process for removing dust, stains, and grime from your canvas wall art using common household items, no harsh chemicals required. Whether your print hangs in the living room, kitchen, or hallway, these methods work without putting the artwork at risk.
What to know before you clean a canvas print
Before you grab a cloth and start wiping, understanding your canvas print's construction will save you from causing permanent damage you can't undo. Most modern canvas prints use inkjet or UV-cured inks printed directly onto a stretched cotton or polyester canvas. That surface is far more porous and fragile than glass or a laminated poster, so moisture and pressure affect it differently than you might expect. Jumping straight to wet cleaning without knowing your print's finish or material is the most common mistake people make, and it's usually the one that leaves marks you can't reverse.
The type of finish matters
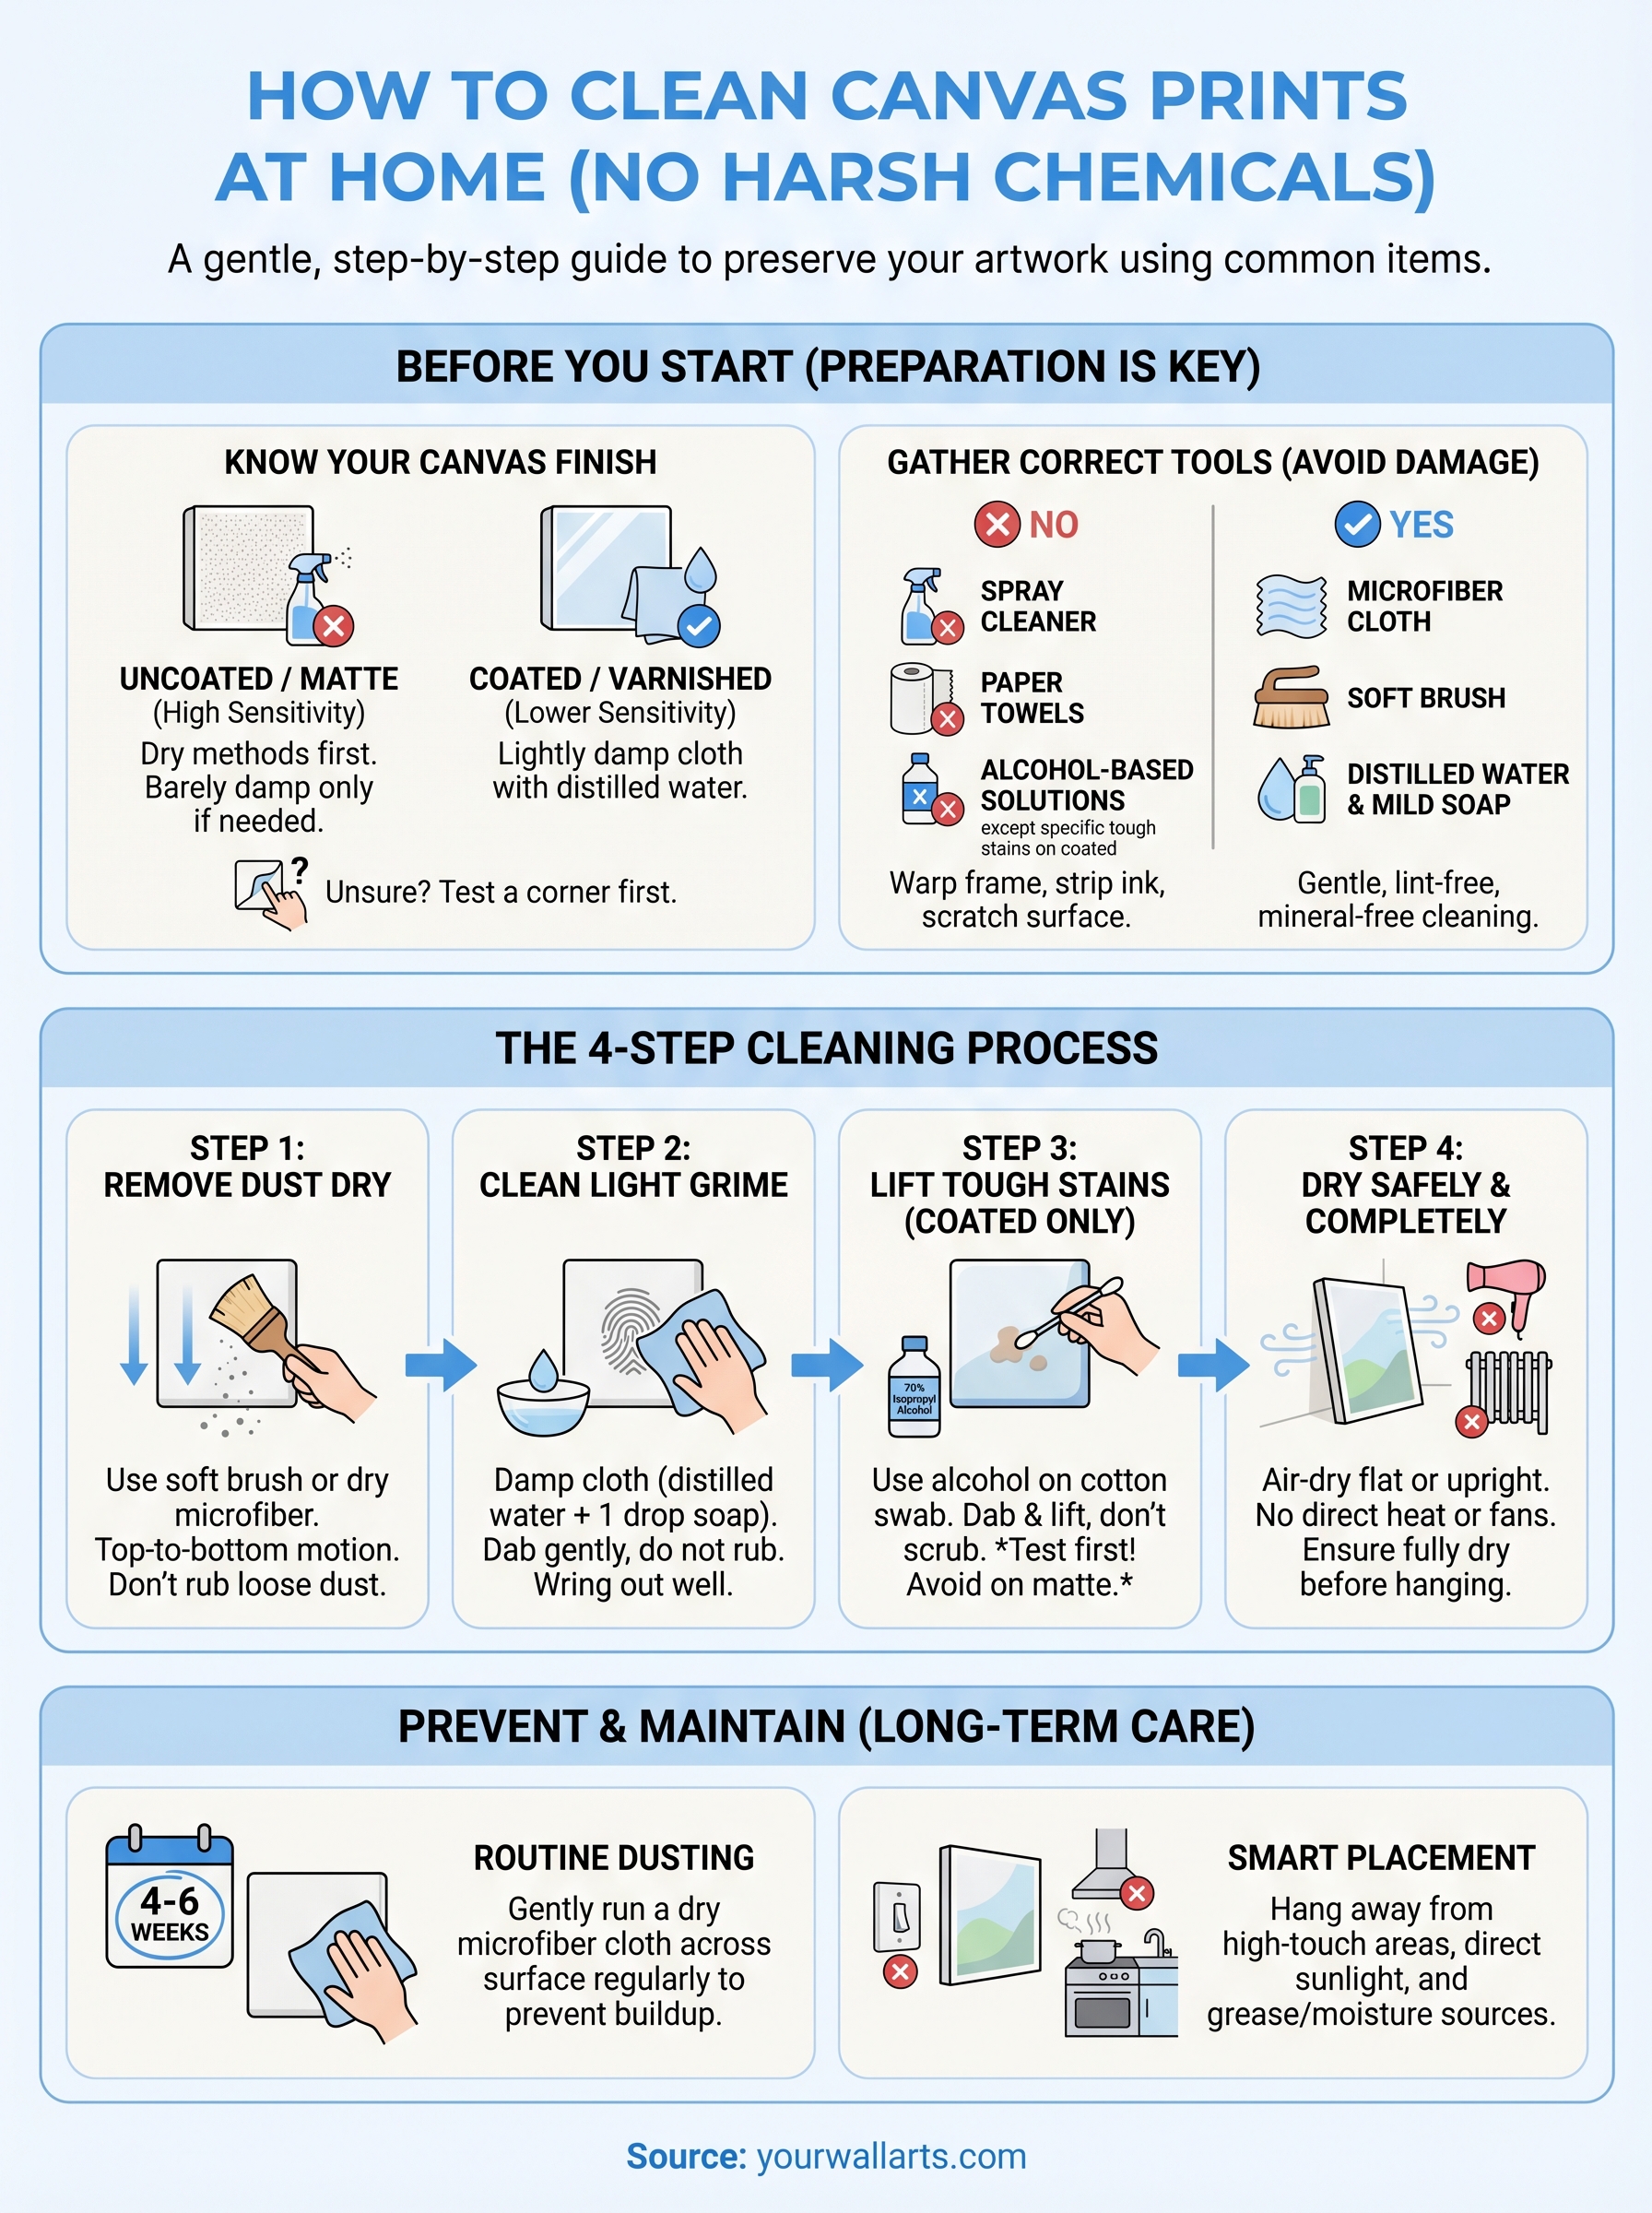
Canvas prints come in two main surface finishes, and each one responds differently to cleaning. A matte or uncoated canvas absorbs moisture more readily, which means even a slightly damp cloth needs careful handling. A coated or varnished canvas has a protective layer sitting over the ink, which gives you more room to work when removing stains or grime. Knowing which type you have before you touch the surface will shape every step that follows.
If you're unsure what finish your print has, check the original product listing or gently run a dry cloth over a small corner and notice how much resistance you feel.
| Finish Type | Sensitivity | Best Cleaning Method |
|---|---|---|
| Uncoated/matte canvas | High | Dry methods first; barely damp cloth only if needed |
| Coated/varnished canvas | Lower | Lightly damp cloth with distilled water |
What to avoid before you start
Knowing how to clean canvas prints correctly starts with understanding what not to bring near the surface. Spray cleaners, alcohol-based solutions, and paper towels should all stay away from your canvas. Sprays saturate the material and can warp the wooden frame underneath, alcohol strips ink from the surface, and paper towels carry enough texture to scratch the canvas fiber when you apply any real pressure.
Microfiber cloths and soft natural-bristle brushes are the two tools you need before starting any cleaning step. Always check that your tools are completely clean before you use them, since a cloth that picked up grit or residue from another surface can drag that debris across the canvas and leave scratches that look worse than the original stain you were trying to fix.
Step 1. Remove dust without scratching
Dust is the first thing to tackle when learning how to clean canvas prints properly, and it's the easiest problem to fix when you approach it the right way. Rushing this step or reaching for the wrong tool is where most people cause unintended damage. Before touching the surface with anything, take the print off the wall if you can manage it safely, so you have full control over the angle and pressure you apply.
Never wipe across a dusty canvas with a cloth before removing loose particles first - you'll grind the dust into the fibers instead of lifting it off.
Use a soft brush for the first pass
A soft natural-bristle brush or a clean, dry microfiber cloth is what you need for this step. Hold the brush at a low angle to the canvas surface and use short, light strokes moving from the top of the print downward. Gravity works in your favor here - brushing downward lets loose dust fall away from the surface rather than getting pushed deeper into the weave.
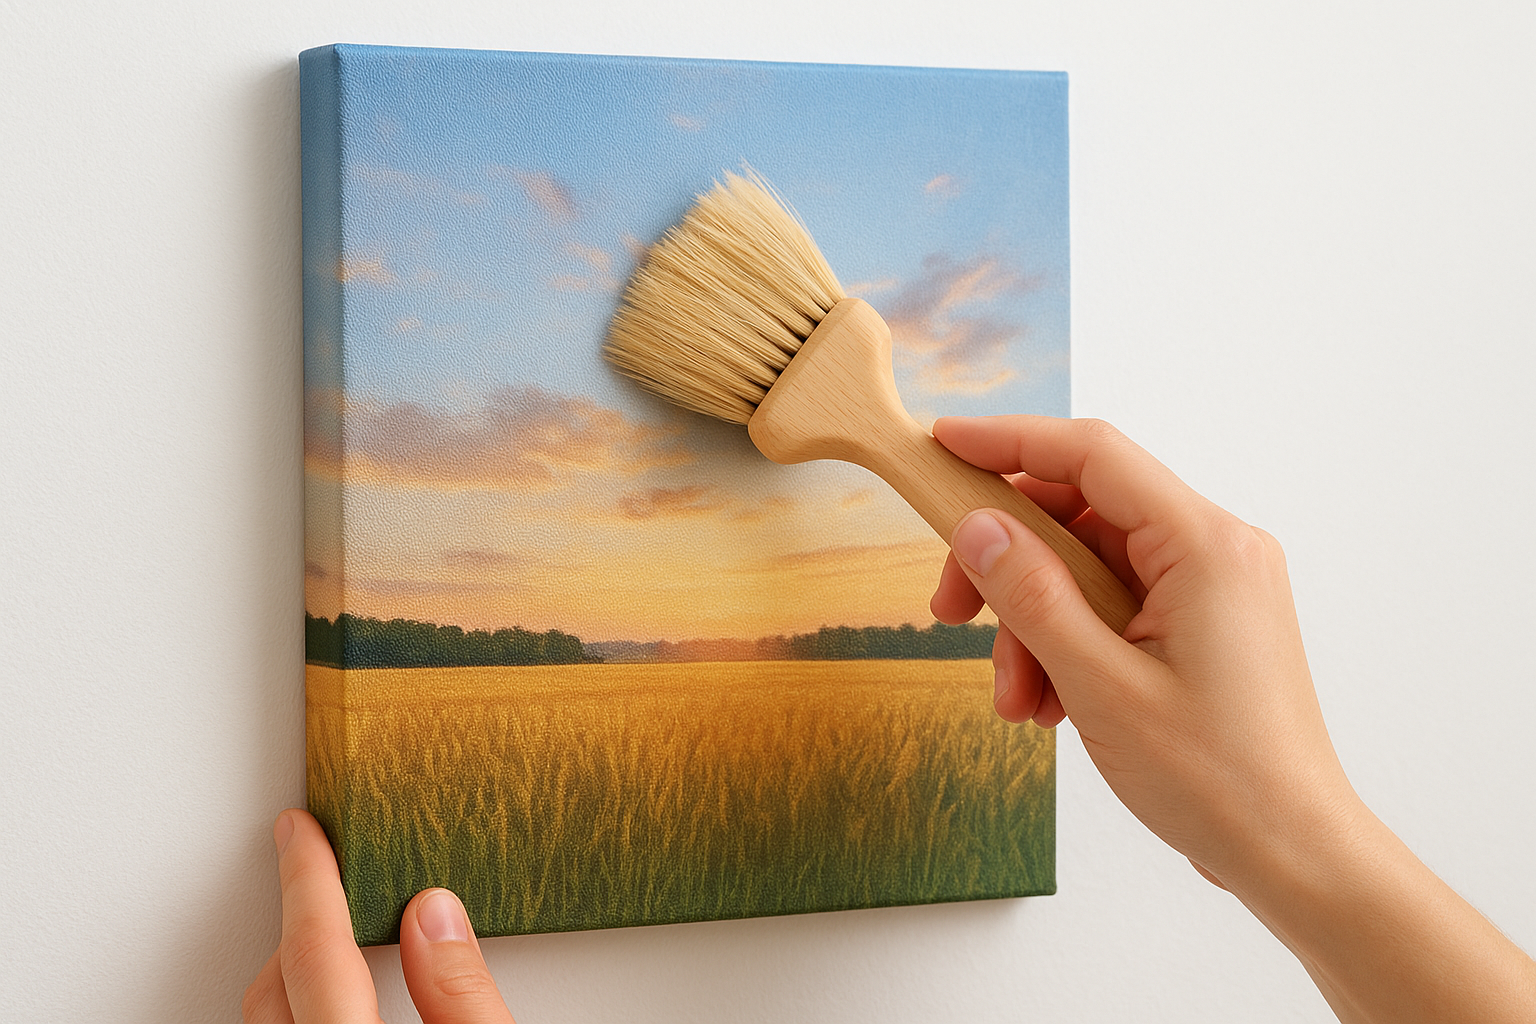
Work across the print in narrow vertical sections so you don't miss any area. If you're using a microfiber cloth instead of a brush, fold it into a flat pad and use the same top-to-bottom motion with almost no pressure. The goal at this stage is to lift dust off the surface, not to scrub it.
Repeat the brush pass twice if the canvas hangs in a high-traffic room or hasn't been cleaned in several months before moving on to the next step.
Step 2. Clean fingerprints and light grime
Once dust is off the surface, you can address fingerprints and the thin greasy film that builds up near doorways or in kitchens. This is where moisture enters the process, so you need to move carefully. The key to knowing how to clean canvas prints at this stage is controlling exactly how much liquid touches the canvas at any point.
Use distilled water rather than tap water - minerals in tap water can leave a faint white residue on the canvas surface once it dries.
Mix your cleaning solution
Your cleaning solution for this step needs only two ingredients: distilled water and a single small drop of mild dish soap (fragrance-free, such as Dawn). Mix them in a small bowl until the soap dissolves fully without creating heavy foam. You want the water barely soapy, not sudsy.
| Ingredient | Amount | Notes |
|---|---|---|
| Distilled water | 1 cup | Avoid tap water |
| Mild dish soap | 1 small drop | Fragrance-free only |
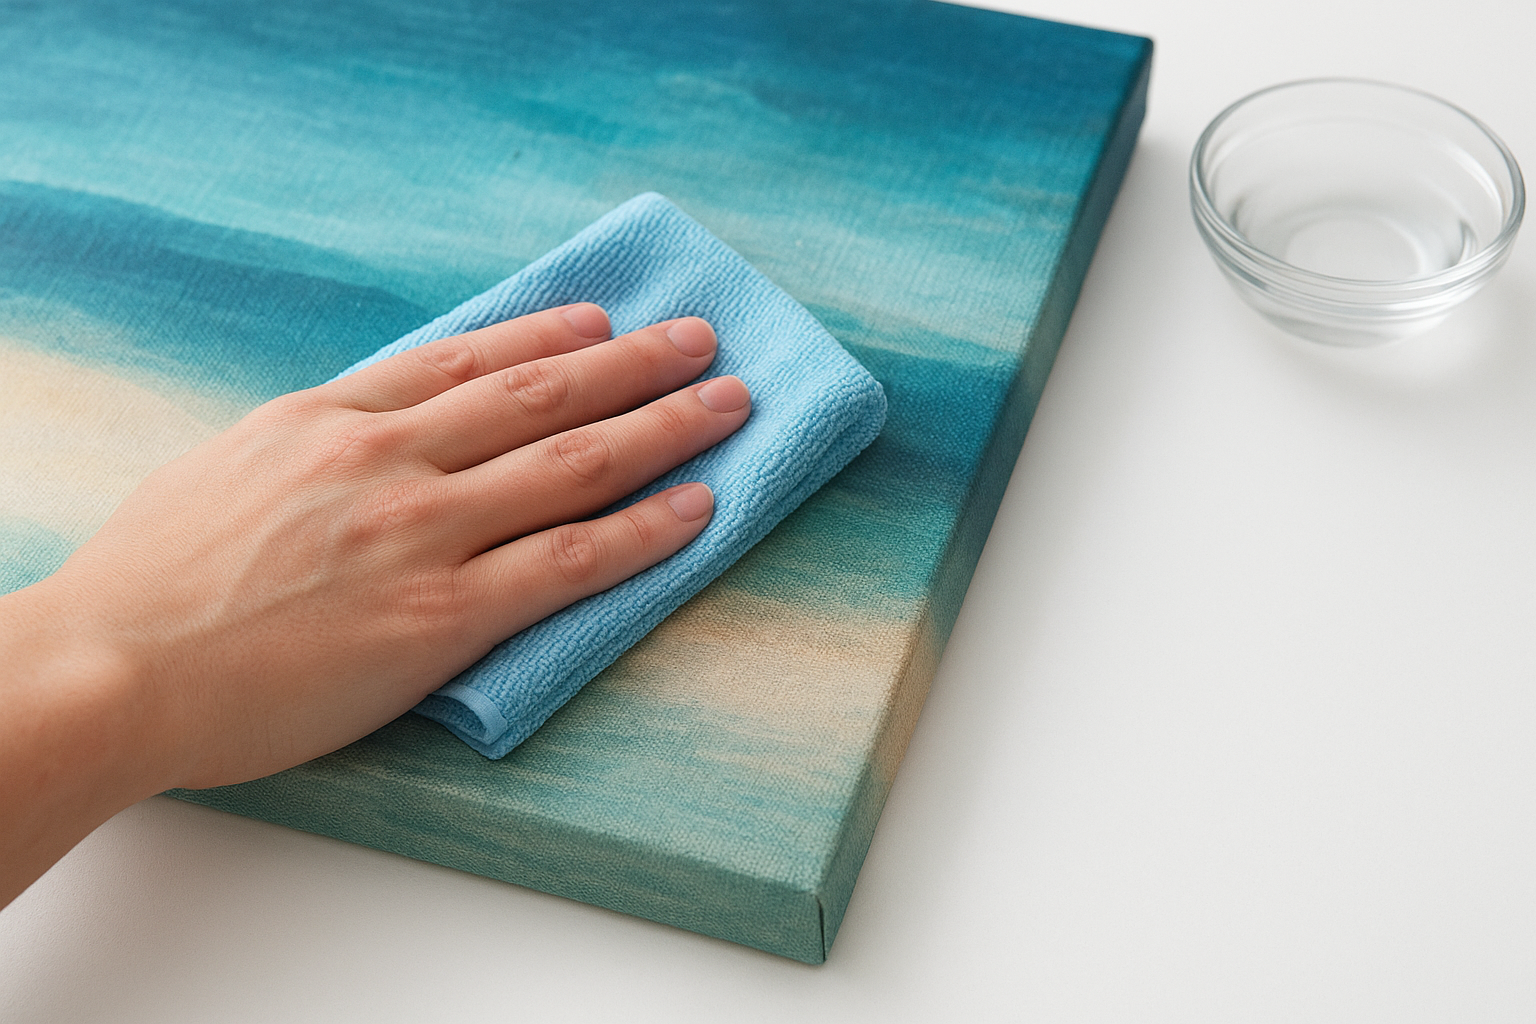
Apply the solution correctly
Dip a clean microfiber cloth into the solution and wring it out until it feels almost dry to the touch. You should not be able to squeeze any liquid from the cloth before you use it. Press the cloth lightly onto the fingerprint or grime spot and hold it there for two to three seconds before lifting it away. Avoid any circular rubbing motion, which smears the mark and pushes it deeper into the canvas fiber.
Repeat the dabbing motion over the same spot two or three times and check your progress after each pass before adding more moisture.
Step 3. Lift tougher stains safely
Some stains sit deeper in the canvas fiber and won't respond to light dabbing with soapy water. Grease splatters, dried liquid marks, and ballpoint ink require a slightly stronger approach, but "stronger" does not mean reaching for a household cleaner. When you're figuring out how to clean canvas prints at this stage, the key rule is to increase cleaning strength gradually rather than jumping straight to a concentrated solution.
Test any new cleaning method on a small, inconspicuous corner of the canvas before applying it to the visible stain.
Try rubbing alcohol on a cotton swab
Isopropyl alcohol at 70% concentration is one of the few stronger agents that can work safely on coated canvas prints. Use a clean cotton swab rather than a cloth to limit the contact area precisely and avoid saturating the surrounding canvas. Follow these steps in order:
- Apply a small amount of isopropyl alcohol to the tip of the swab.
- Press gently onto the stain and rotate the swab slightly to lift residue upward.
- Replace the swab after each pass so you don't redeposit what you just removed.
- Check progress after every two passes before continuing.
Know when to stop
Uncoated or matte canvas prints should not receive isopropyl alcohol under any circumstances, since the alcohol can pull ink from the surface immediately. If you've worked through the soap solution method and the swab technique on a coated canvas and the stain still remains, stop and leave it. Continued scrubbing causes more visible damage than the original stain, and no home cleaning method will restore ink that has already lifted from the surface.
Step 4. Dry it right and prevent new marks
Drying is the step most people skip over, and it's where preventable damage often happens. After any wet cleaning, the canvas still holds trace moisture inside the fibers and against the wooden stretcher frame. Putting it back on the wall before it dries fully can cause the frame to swell or warp, which pulls the canvas unevenly and distorts the image from behind.
Let the canvas air-dry completely
Once you finish cleaning, lay the print flat on a dry surface or prop it upright against a wall in a room with good air circulation. Keep it away from direct sunlight and away from heat sources like radiators or vents, since concentrated heat dries the canvas unevenly and can cause the surface to crack. Room temperature air is all you need here.
Never use a hair dryer or fan heater to speed up the drying process, even on a low setting, since directed heat causes uneven tension across the canvas surface.
A canvas print that received light spot-cleaning typically dries within 30 to 60 minutes. If you used a wetter cloth on a larger area, wait a full two hours before hanging it back up and checking the frame for any signs of moisture.
Stop new marks before they form
Knowing how to clean canvas prints matters less if the same marks return within weeks. Position your print away from high-touch wall areas, such as directly beside light switches or above kitchen counters where grease drifts upward. Running a dry microfiber cloth lightly across the surface every four to six weeks keeps dust from building up into the heavier layers that require wet cleaning.
Keep your canvas looking new
Knowing how to clean canvas prints is really about building a simple routine rather than reacting to damage after it sets in. A dry microfiber pass every four to six weeks handles most of what accumulates on a canvas surface, and it takes less than two minutes to do. When something more stubborn appears, work through the steps in this guide in order, starting dry and adding moisture only when you need it. Your canvas print will stay sharp and vibrant for years when you treat the surface with consistent, gentle care rather than occasional aggressive scrubbing.
Choosing a high-quality canvas print from the start also makes long-term care easier, since better materials and protective finishes hold up to routine cleaning without degrading. If you're ready to find a piece worth taking care of, browse the full range of premium canvas and acrylic prints at Yourwallarts and pick one that fits your space.